Spoofing Your Mac Address
IN PROGRESS 15 Feb 2016 spoofing

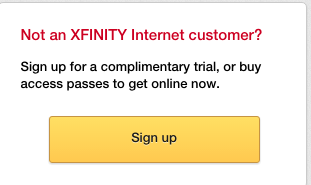
This post will address the different methods you can take to bypass wifi-time restrictions commonly found in coffee shops, airports, xfinity hotspots, etc. This post will cover the methods most commonly used for Windows OS (XP,Vista,7,and 10), Linux (too many distros to list), and OSX (Lion, Mavericks, Yosemite, etc.). Below are some pictures of what typical wifi-time restrictions look like:
Any hotspots commonly named “xfinitywifi” (saying commonly because hotspots could be spoofed, so be weary), are most likely owned by the ISP Comcast. They’ve been generous enough to offer a complimentary hour of free internet by just providing an email address (you don’t need to validate so come up with any random one) and a zip code (again could be any valid one).

Some coffee shops like Panera Bread and Starbucks will place restrictions to how long a user can stay connected to it’s wifi. Typically during busy hours, these coffee places will allow a user up to an hour of complimentary access. The obvious reason for this is so customers don’t sit there all day just to use the wifi while not buying anything. They want to ensure there is room for new customers to come in and buy food.

A network can monitor how long a user has been connected by primarily relying on monitoring the device’s MAC address. A MAC address is a unique identifier given to a NIC (Network Interface Card) found in most laptops, which is needed to identify wireless networks. By keeping track of how long a MAC address has been connected to a network, the network can control when a device is kicked off. A popular network application for controlling this is called AirWatch. When AirWatch determines the device has used it’s allotted amounted of time, it’s MAC address is usually placed in a blacklist for a short period of time that restricts the device from connecting back to the network. However, there are some very simple methods around these restrictions, as seen below.
OSX/Linux
For OSX and Linux distros, a simple command can get you connected right back on the network. The first thing you’ll need to determine is the MAC address of your NIC. Using the command below, the MAC address of your NIC is usually going to be found next to en0 or en1 expressed as ether xx:xx:xx:xx:xx:xx. If you’re unsure which MAC address is used for your NIC, select either en0 or en1 with status: active. NOTE: en0 is usually saved for wired connections, such as an ethernet connection, so you will most likely be using en1
ifconfigSave the old MAC address to a text file somewhere on your desktop. While you’ll be changing the MAC address to a new one so you can reconnect, you will end up changing it back to this old one so you won’t have to re-eestablish all the wireless networks your computer used to automatically authenticate to. Once that is done, run the following command:
sudo ifconfig en1 ether xx:xx:xx:xx:xx:xx«««< HEAD:_posts/2015-10-01-spoofmac.markup You may need to enter your root password for the changes to take place, but once that’s done, turn off your wifi off and back on for the new MAC address to take hold. ======= Note: You may need to enter your root password for the changes to take place.
Once that’s done, turn your wifi off and then back on for the new MAC address to be written to the NIC.
origin/master:_posts/2016-02-15-spoofmac.markup